Storage
1 Overview
Access to SeaBee data is provided by MinIO, which offers high-performance, S3-compatible object storage. At the highest level, files within MinIO are organised into buckets. For example, there are currently buckets for niva, nina, ntnu etc. Within these, files are organised within folders and sub-folders, just like a standard file system. Each organisation or project is responsible for organising their data in a way that suits their workflows. However, folders containing mission data (raw drone images etc.) must be organised in a consistent way - see the Data upload page for details.
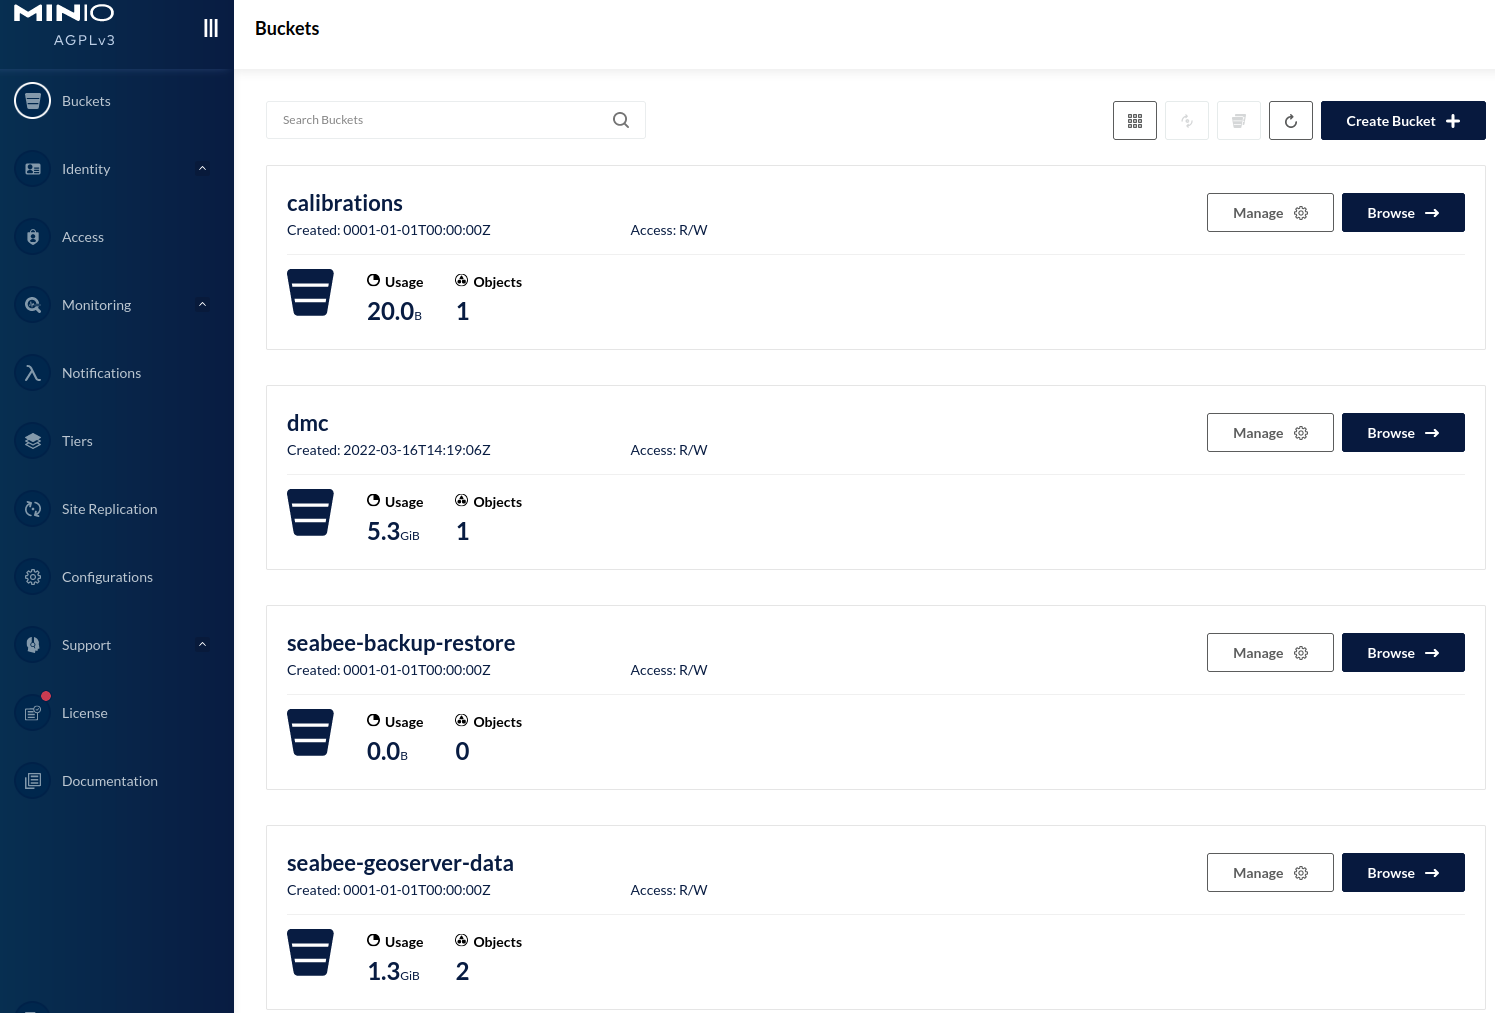
To access data on MinIO, you first need to create an account. You can then login to the SeaBee MinIO web interface (Figure 1) and browse files in a similar way to e.g. DropBox or GoogleDrive. If you need to work with SeaBee data from your code, there is also an S3-compatible storage endpoint at https://storage.seabee.sigma2.no (see Section 3 for details).
2 Backups
Files stored on NIRD follow the regular backup schedule described here. For the GeoNode databases, backups should be dumped to the seabee-backup-restore bucket (which is then backed-up via the standard NIRD regime).
3 Working with files
There are several options for interacting with files stored on MinIO.
3.1 MinIO web interface
The MinIO console located at https://minio.seabee.sigma2.no/login provides a graphical interface to browse, upload and download files (Figure 1).
To upload data, navigate to the location you wish to add data to, click Upload, then select either Upload Folder or Upload File. To download, mark the desired folder/files using the checkboxes and click Download.
The MinIO web interface is suitable for browsing SeaBee files and up/downloading small datasets. It is not designed to transfer large volumes of data, such as high resolution orthomosaics. To move large datasets to/from the SeaBee platform, you should use dedicated software designed for managing files hosted in the cloud. See the sections below for suggestions.
3.2 Machine Access
To use the S3 API, you first need a standard SeaBee MinIO account. You can then use your credentials to access the endpoint at https://storage.seabee.sigma2.no.
3.2.1 Python
All python libraries supporting the S3 API will be able to interact with the MinIO storage. One good option for Python is the S3Fs library. The seabeepy package also includes convenience functions designed to make it easier to manipulate SeaBee data hosted on MinIO from Python code. See, for example, the copy_file, delete_file, copy_folder and delete_folder functions in the seabeepy.storage module.
3.2.2 Rclone
Rclone provides a convenient way of synchronising files local -> cloud or cloud -> cloud. Rclone keeps track of the transferred files and will retry if the connection is interrupted. It is therefore the best option for users wishing to transfer large volumes of imagery to/from Sigma2.
3.2.2.1 Setup
To install rclone follow the instructions for your operating system. It is a single excutable that you can download.
The rclone binary is downloaded as a zip archive. Unzip this to a suitable folder on your system (e.g.
C:\My_Software\rclone-v1.64.2-windows-amd64).Add rclone to your system’s
Pathso it is recognised from the command line:- Right-click on Computer or This PC on your desktop or in File Explorer, and choose
Properties - Click on Advanced system settings
- In the System Properties window that appears, click the Environment Variables button
- In the Environment Variables window, under System variables, find the
Pathvariable, select it and click Edit - In the Edit Environment Variable window, click on New and then paste the path to the directory where rclone is located (not including
rclone.exeitself). For example,C:\My_Software\rclone-v1.64.2-windows-amd64 - Click OK in each window to close them
- Right-click on Computer or This PC on your desktop or in File Explorer, and choose
After completing these steps, you should be able to open PowerShell or a Command prompt and type rclone. If everything is working, you’ll see a list of available commands; if not, you’ll see an error like Command not recognised.
- Follow the steps below (common to all OSs) to configure the connection to SeaBee’s MinIO.
Once rclone is installed, you need to provide it with your MinIO credentials so it can interact with SeaBee data on your behalf. The quickest way to do this is to add SeaBee’s MinIO storage endpoint (https://storage.seabee.sigma2.no) as an rclone “remote”. This is done by creating and editing a text file called rclone.conf. Check the location of this file by running the following command from a terminal
rclone config fileIf the file does not exist, create it at the location specified and then add this section
[seabee-minio]
type = s3
provider = Minio
access_key_id = <ACCESS_KEY_ID>
secret_access_key = <SECRET_ACCESS_KEY>
endpoint = storage.seabee.sigma2.no
where <ACCESS_KEY_ID> can be your MinIO user name or a service account, and <SECRET_ACCESS_KEY> is the accompanying password. Remember to save the changes to this file.
To check that everything is working run this command
rclone lsd seabee-minio:which should list the buckets on MinIO.
The configuration steps above can also be completed by following rclone’s interactive configuration session, which is started using
rclone configRclone will ask a series of questions and then create the configuration file for you at the correct location. For most options, just accept the default. When asked about the storage type, choose S3 compliant (option 5). The endpoint to use is storage.seabee.sigma2.no.
If you intend to interact with SeaBee data regularly, it is convenient to setup autocomplete for rclone, so it completes commands and paths when you press TAB.
3.2.2.2 Command-line usage
See the Rclone documentation for a full list of available commands. For SeaBee, the most useful commands are likely to be rclone mount --read-only, rclone copy and rclone sync, in addition to standard OS commands such as ls and mkdir. rclone help is also useful.
As an example, the following command would copy data from a local (Windows) system to a location on MinIO within the NTNU bucket (assuming the user has “write” access)
rclone copy -P -v -i "C:\path\to\my\data\flight_folder" seabee-minio:ntnu/2022/flight_folderIn this example, the -P, -v and -i flags are optional:
-P(--Progress) prints the progress of the data transfer-v(--verbose) prints additional details that may be useful for debugging-i(--interactive) is useful for beginners learning to use rclone. With this flag enabled, rclone will ask for confirmation before performing certain tasks. This is useful for new users because the wrong command could accidentally delete/replace a lot of data. It is recommended to start off using the-iflag and then remove it once you have gained confidence. The--dry-runflag can also be helpful: it prints a detailed plan for what rclone will do when you run the command, but does not actually make any changes.
3.2.2.3 rclone user interface
RcloneBrowser is a cross-platform application providing a graphical user interface to rclone. For users not comfortable with the command line, it offers a point-and-click interface capable of transferring large volumes of data to/from the SeaBee platform. RcloneBrowser can be installed on your local machine by downloading the appropriate binary for your OS from here.
To use RcloneBrowser, you must first install and configure the command line version, as described Section 3.2.2.1. The GUI simply makes it easier to build rclone commands, which are then submitted to “standard” rclone.